Step-by-Step Process of Building a Custom Pool in East Texas
So you've decided you want a pool.
Now what?
If you've never built a pool before, the process can feel like a black box. You know what you want (a beautiful pool in your backyard), but how do you actually get from idea to first splash?
Let me walk you through it. This is the exact process we follow at Patriot Pool Co, from the moment you call to the day we hand you the keys to your new backyard oasis.
No surprises, no confusion. Just a clear roadmap of what happens and when.
Step 1: The Initial Consultation (Week 0)
Everything starts with a conversation.
When you reach out, we'll schedule a free on-site consultation at your property. This isn't a sales pitch. It's a chance for me to see your space, understand what you're looking for, and figure out if we're a good fit.
What Happens During the Consultation
I'll show up with a tape measure, notebook, and probably too many questions. Here's what we'll cover:
Your Vision:
What do you want to do in your pool? (Swim laps? Play with kids? Entertain friends?)
What features are you dreaming about? (Spa? Waterfall? Tanning ledge?)
What's your timeline and budget?
Your Property:
Where's the best spot for the pool?
What's the slope and drainage situation?
Where should equipment go?
Any obstacles? (Trees, utilities, septic systems?)
The Reality Check:
I'll give you a ballpark price range right there (usually within $10-15k of the final number)
We'll talk about what's possible and what's not
I'll answer every question you have
Most consultations take 45 minutes to an hour. By the end, you'll know if a pool makes sense for your property and budget.
Step 2: Custom 3D Design (Week 1)
If you want to move forward, the next step is design.
I'll take everything we discussed and create a custom 3D rendering of your pool. This isn't a generic template. It's designed specifically for your yard, your family, and your vision.
Why 3D Renderings Matter
You're about to spend a significant amount of money on something permanent. You should see exactly what you're getting before we break ground.
The rendering shows:
Pool shape and size
Depth variations
Features (spa, tanning ledge, waterfalls, etc.)
Decking layout
How it fits in your actual yard
We'll text or email the design back and forth until it's right. Want to adjust the shape? Move the spa? Make the tanning ledge bigger? No problem. This is the time to dial it in.
Step 3: Detailed Proposal (Week 1-2)
Once the design is finalized, I'll put together a complete proposal.
And here's where we're different: it's itemized. You'll see exactly what you're paying for.
What's in the Proposal
Every line item, broken down:
Excavation costs
Steel and rebar
Concrete (gunite)
Plumbing and equipment
Tile and coping
Plaster finish
Decking
Features (spa, lighting, waterfalls, etc.)
Permits
Labor
No vague categories. No hidden fees. Just transparent pricing so you understand where every dollar goes.
Most proposals are 3-5 pages and include the 3D rendering, timeline, payment schedule, and warranty information.
Step 4: Contract and Scheduling (Week 2-3)
If you're ready to move forward, we'll sign the contract and collect the first deposit.
Then we start scheduling. Pool construction involves 8-12 different contractors and subcontractors, so coordination is key. I'll map out the entire timeline and give you specific dates for each phase.
What We're Scheduling
Permit applications (if needed)
Excavation
Plumbing and electrical
Steel installation
Gunite (concrete shell)
Tile and coping
Decking
Equipment installation
Plastering
Startup
You'll know when each crew is coming and what they'll be doing. No guessing, no surprises.
Step 5: Permits and Approvals (Week 3-4, if applicable)
If your property is in city limits, we'll need permits.
This part isn't glamorous, but it's necessary. We handle all the paperwork, submit plans to the city, and coordinate inspections.
Timeline:
Out in the country? No permits needed. We move straight to excavation.
In city limits? Permits usually take 1-2 weeks, sometimes longer depending on the city.
I've worked with every city in East Texas, so I know the process and what each jurisdiction requires. You don't have to deal with any of it.
Step 6: Excavation (Day 1-2)
This is when it gets real.
A big excavator shows up and starts digging. Within a day or two, you'll have a giant hole in your backyard that's starting to look like a pool.
What Happens During Excavation
We dig to the exact depth and shape from your design
Haul away the dirt (or spread it on your property if you want)
Rough-grade the area around the pool
Expose any utilities so we know where everything is
Pro tip: Take pictures. The transformation from hole-in-the-ground to finished pool is amazing, and you'll want to remember where you started.
Step 7: Plumbing and Steel (Week 1-2)
Once the hole is dug, we install all the underground plumbing and structural steel.
Plumbing Phase
We run all the pipes for:
Main drains
Skimmers
Return jets
Any water features (waterfalls, bubblers, etc.)
Spa plumbing (if applicable)
Equipment connections
Everything gets pressure-tested to make sure there are no leaks before we move on.
Steel Phase
Next, we install rebar (steel reinforcement) throughout the entire pool shell. This is what gives the concrete its strength.
We're talking hundreds of pounds of steel, all tied together in a grid pattern. It's engineered to withstand ground movement, water pressure, and decades of use.
Inspection checkpoint: If you're in city limits, the city inspects the plumbing and steel before we can proceed.
Step 8: Gunite (The Concrete Shell) (Day 1)
This is one of the most impressive days of the whole process.
Gunite is a special concrete mixture that's sprayed at high pressure over the steel framework. It forms the structural shell of your pool.
What to Expect
A gunite crew shows up with a big truck and a spray hose
They spray 6-8 inches of concrete over the entire pool in one day
It's loud, messy, and awesome to watch
By the end of the day, you have a solid concrete pool
The gunite needs to cure for 2-3 weeks before we can move to the next phase. During this time, we keep it moist so it cures properly and doesn't crack.
Step 9: Tile and Coping (Week 4-5)
While the gunite is curing, we start working on the finishing touches.
Tile Installation
We install waterline tile around the perimeter of the pool. This isn't just decorative (though it looks great). It also protects the plaster from sun and chemical damage at the waterline.
You'll choose your tile during the design phase, and we'll install it with precision so every line is straight and every piece is perfectly placed.
Coping Installation
Coping is the cap that goes around the edge of the pool. It's what you grab when you're in the water, and it provides a clean transition between the pool and the deck.
Options include:
Natural stone (travertine, flagstone, etc.)
Precast concrete
Brick
We use travertine on most pools because it's durable, beautiful, and stays cool underfoot (important in Texas heat).
Step 10: Decking (Week 5-6)
The deck is everything around the pool where you'll walk, lounge, and entertain.
Decking Options
Concrete: Most common, affordable, customizable with colors and textures
Travertine pavers: Premium look, naturally cool, very durable
Flagstone: Natural, rustic appearance
We'll pour or install your deck with proper drainage so water flows away from the pool and doesn't puddle.
We also install any additional features at this stage:
Equipment pads
Outdoor kitchen foundations
Fire pit areas
Walkways
Step 11: Equipment Installation (Week 6-7)
Now we install all the mechanical systems that make your pool work.
What Gets Installed
Pump: Circulates water through the system
Filter: Removes debris and keeps water clean
Heater/Chiller: Controls water temperature
Salt generator or chlorinator: Sanitizes the water
Automation system: Controls everything from your phone
This is where my engineering background really shows. Every piece of equipment is properly sized for your specific pool volume, properly plumbed, and set up for maximum efficiency.
Electrical Work
A licensed electrician runs power to:
Pool equipment
LED lights in the pool
Any water features
Outdoor lighting
Everything is grounded and bonded to code for safety.
Inspection checkpoint: Electrical gets inspected before we move forward.
Step 12: Plaster (Interior Finish) (Week 7-8)
This is the final layer inside your pool the surface you'll actually see and touch.
Plaster Options
Standard white plaster: Classic, affordable, smooth
Colored plaster: Blues, grays, blacks for different water colors
Pebble finishes: Premium look with natural stone aggregates
Quartz finishes: Durable, colorful, long-lasting
We apply about 3/8 to 1/2 inch of plaster over the entire interior surface in one day. It has to be done quickly and precisely, so we bring in experienced crews who do this for a living.
Acid Wash (if applicable)
Some finishes (like pebble) require an acid wash a day or two after application to reveal the stones and create the final texture.
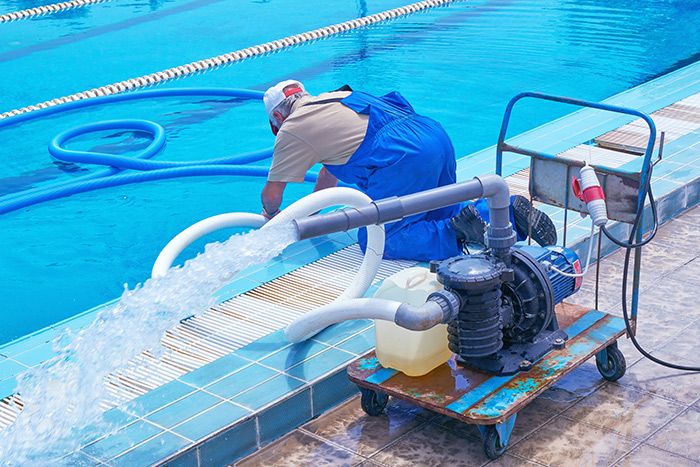
Step 13: Fill and Startup (Week 8)
The moment you've been waiting for: we fill your pool.
The Fill Process
Takes 24-36 hours depending on water pressure
We monitor it the whole time
Once full, we start up all the equipment
Balance the water chemistry
Program the automation system
Test every feature to make sure it works perfectly
Pool School
Before we hand over the keys, I'll give you a complete walkthrough:
How to operate the equipment
How to use the automation system
Basic water chemistry (testing, balancing, adding chemicals)
Maintenance schedule
What to watch for
When to call for help
Most pool schools take 30-45 minutes. I want you to feel confident operating your pool, not overwhelmed.
Step 14: Startup Period (Week 8-10)
For the first 7-10 days, your pool needs special care while the plaster cures.
What You'll Do
Brush the pool daily (removes loose plaster particles)
Run the pump continuously
Monitor chemistry closely
We'll check in regularly during this period to make sure everything's going smoothly. Some clients hire us to handle the startup brushing. Others prefer to do it themselves. Either way works.
Step 15: Final Walkthrough and Completion (Week 8-12)
Once the startup period is complete, we do a final walkthrough together.
The Punch List
Pool finish quality
Tile alignment
Equipment operation
Lighting
Decking
Any features
If there's anything that needs adjustment, we handle it immediately. We don't consider the job done until you're 100% satisfied.
Then we collect the final payment, hand over all warranties and manuals, and you're ready to enjoy your pool.
Timeline Summary
Here's the typical timeline from start to finish:
Weeks 0-3: Consultation, design, permits
Weeks 1-2: Excavation, plumbing, steel
Week 2: Gunite
Weeks 4-6: Tile, coping, decking
Weeks 6-7: Equipment and electrical
Week 7-8: Plaster
Week 8: Fill and startup
Weeks 8-10: Startup period
Week 8-12: Final walkthrough
Total time: 8-12 weeks from breaking ground to first splash.
Weather, permit delays, and material availability can affect the timeline, but this is what we plan for.
What Makes Our Process Different
Transparent Communication:
I text you the day before every contractor shows up. If there's a delay, you'll know immediately. No ghosting, no wondering what's happening.
Itemized Pricing:
You know exactly what you're paying for at every stage. No surprise "change orders" for things that should've been included.
Engineering Standards:
Every phase is done to precise specifications. We don't cut corners, even on things you can't see.
Personal Service:
You're working with me directly, not a project manager you've never met. I'm on-site regularly, and I answer my phone.
Ready to Start Your Pool Project?
Now you know exactly what to expect. No mystery, no confusion. Just a clear path from consultation to completion.
If you're ready to start designing your custom pool, let's talk.
I'm Doug Johnson, owner of Patriot Pool Co in Longview, Texas. We serve families throughout East Texas Tyler, Marshall, Kilgore, Lindale, Texarkana, and beyond.
Let's build something your family will love for decades.
Doug Johnson
Owner, Patriot Pool Co
225 Towering Oaks Hvn, Longview TX 75602
Doug Johnson is the owner of Patriot Pool Co, helping homeowners across East Texas with pool construction, remodeling, maintenance, and repair services.
Request Your Free Consultation